
DIY Magnetic Phonogram Tiles
As the second half of my summer begins, I’m excited to find myself working with a handful of young kiddos as part of my district’s Extended School Year (ESY) program. Simply put, I am teaching summer school and loving it!
Our literacy focus will be predominately on letter recognition and strengthening letter-sound (phoneme-grapheme) correspondences. I quickly realized that my 3rd grade classroom toolkit was lacking when it came to the supplies required. Without funds or the time to wait for items to arrive, I set out to create what I needed.

Phonogram, Grapheme, Letter Tiles, oh my!
First on my list was magnetic phonogram/grapheme/letter tiles. The terms phonogram and grapheme can really be used interchangeably so to keep things simple, I’ll use phonogram from here on. I’m intentional about not just calling them letters, however, because I want to be clear in my mind about their instructional purpose. They are the written symbols that we will use to represent the phonemes, or spoken sounds, in the English language. We will use them to practice phoneme-grapheme mapping as we support orthographic mapping in our brains. If these terms are new and/or confusing to you, I’ll include some links below for more info.
If you have the budget for them, there are beautiful options out there for phonogram tiles from companies like Voyager Sopris, The Logic of English, and Really Great Reading. If you are more of a classroom DIY’er like myself, then the option I’ll share here may be more your speed.
DIY Directions
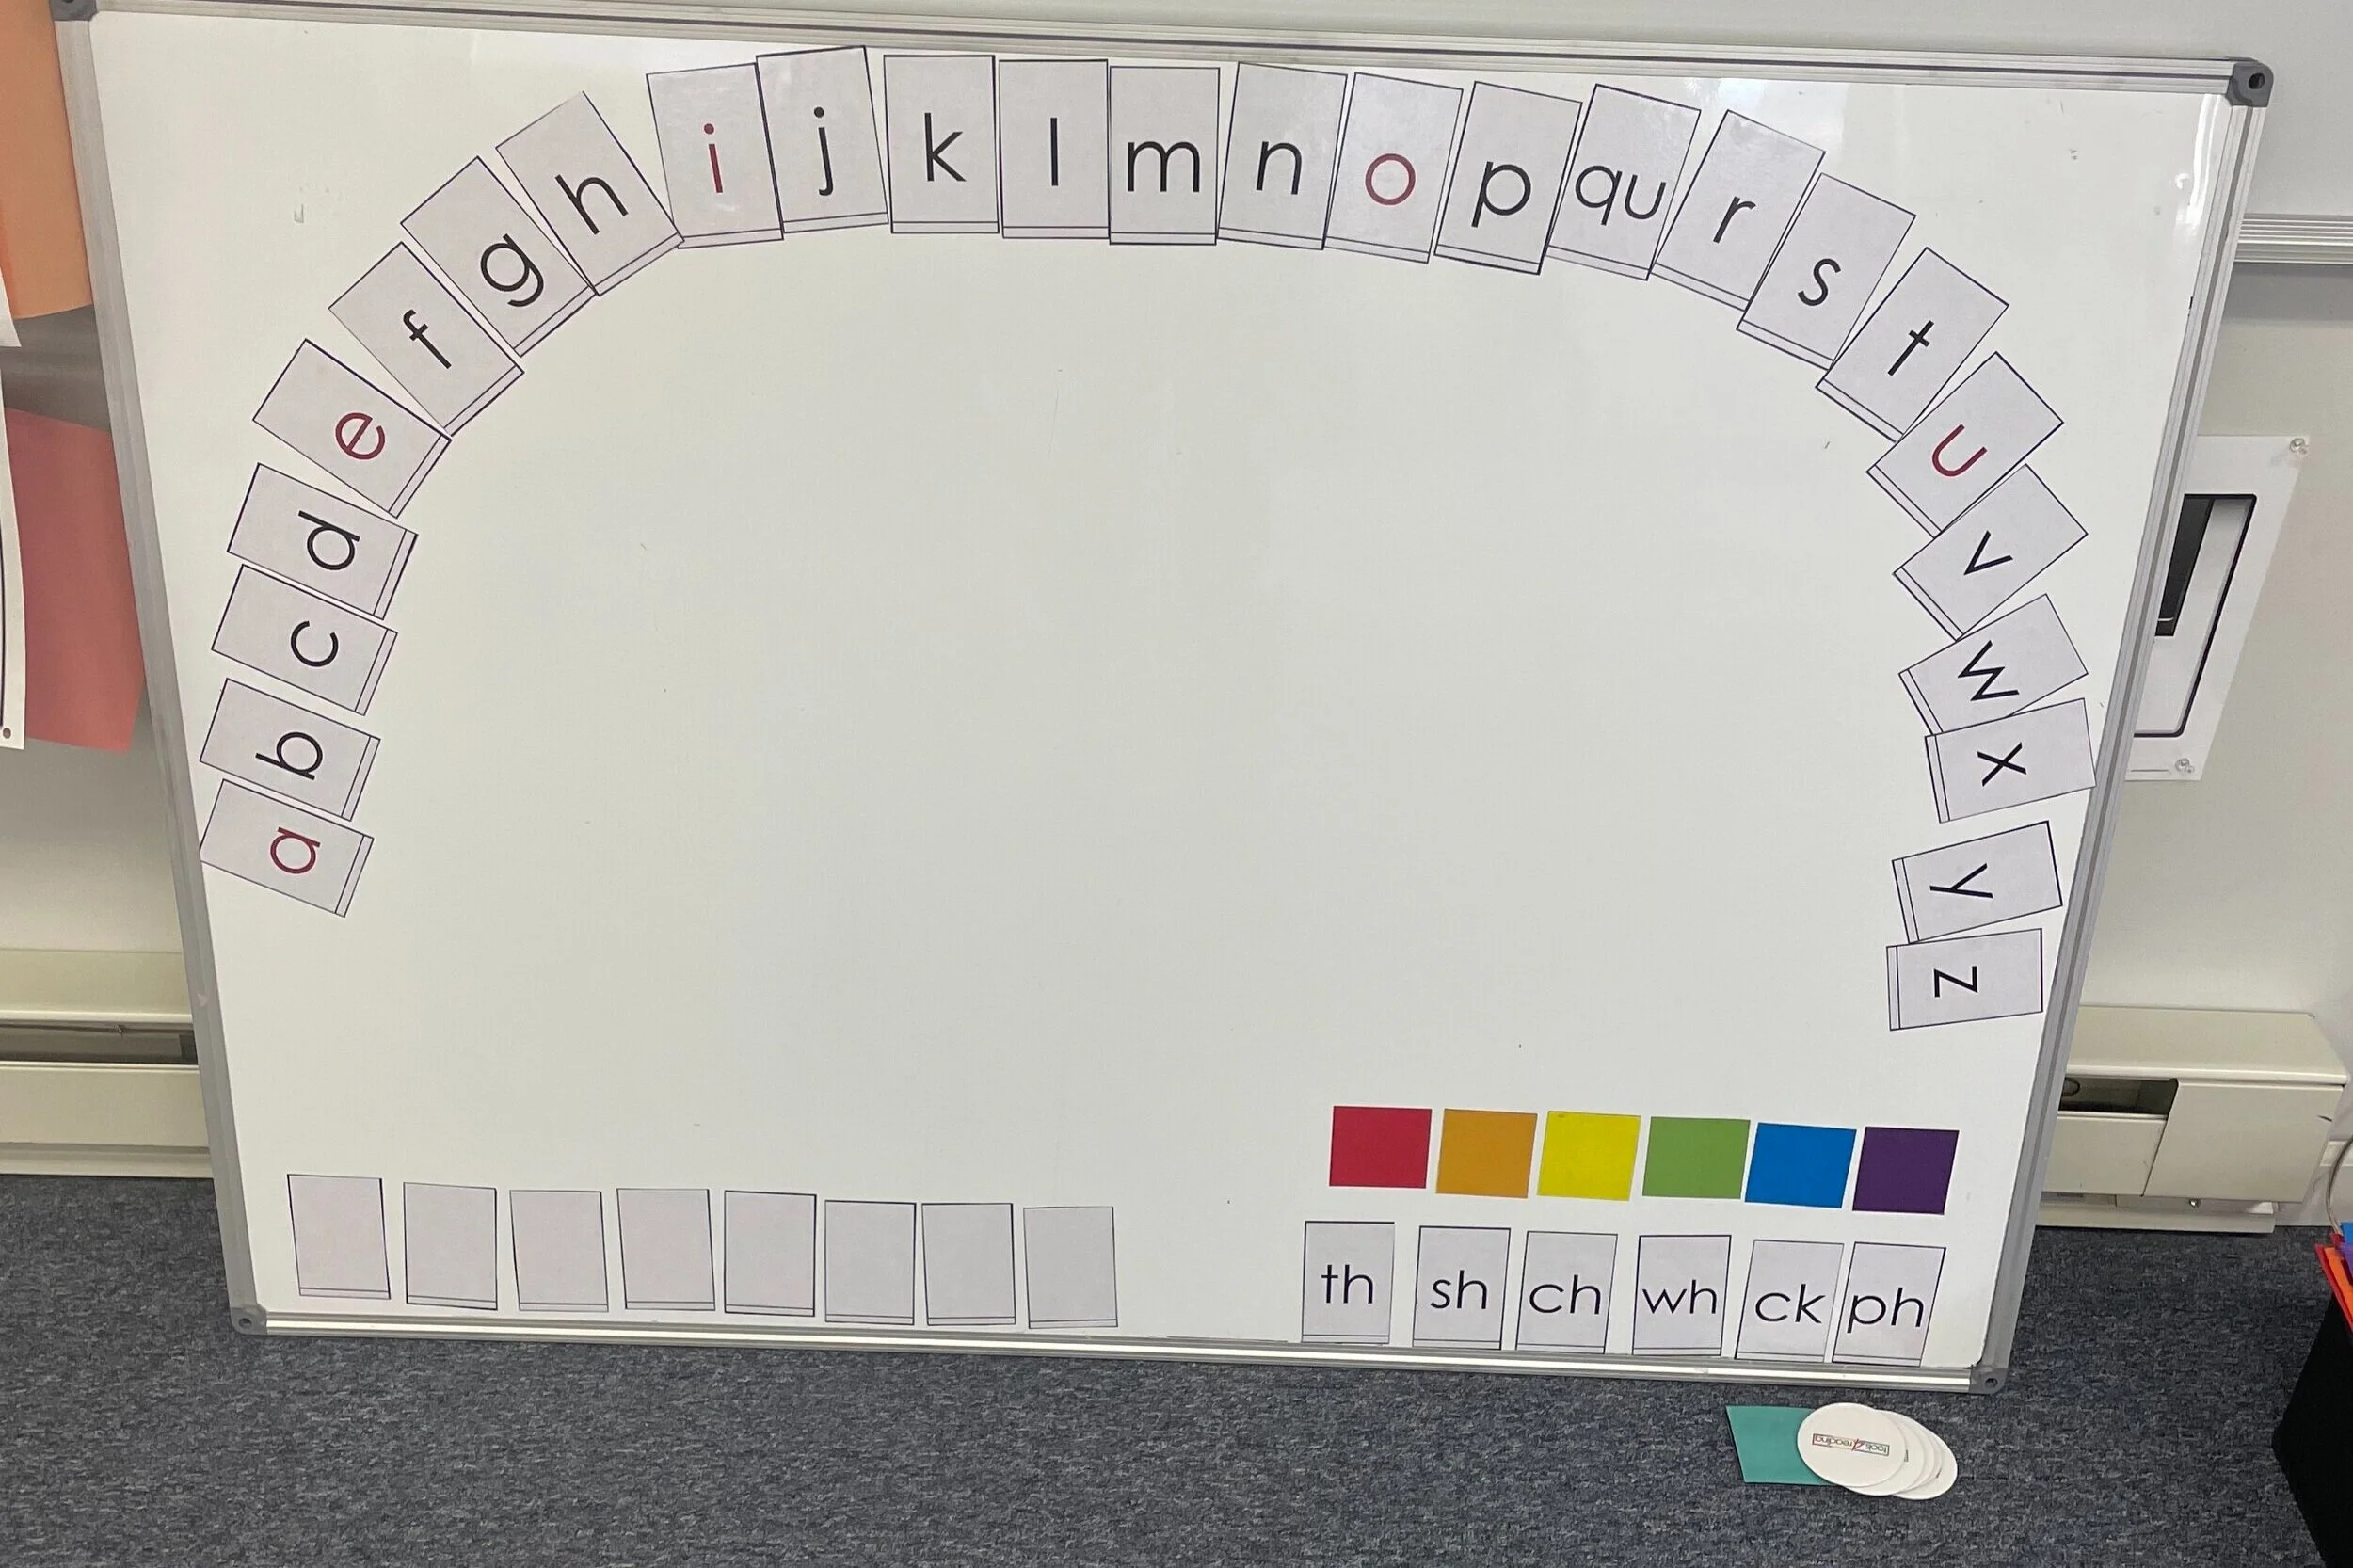
First, I created a template in PowerPoint with the phonograms I needed. For my kiddos, I needed the 26 letters of our alphabet and I added a few digraphs, just in case. I use Century Gothic for my font on almost everything I give students because I like the readability. You’ll find Q written as QU to reinforce the rule that Q always needs a U after it in English words and you’ll notice that the vowel letters are in red. You can find my phonogram template here for free! It’s editable so make it work for you!

Next, I wanted to make my phonograms magnetic. I plan to use them on a magnetic whiteboard at the front of my classroom and on a smaller magnetic whiteboard for small group instruction. I ordered 8”x10” adhesive magnetic sheets from Amazon and have been really happy with how well they’ve worked so far. These magnetic sheets work like a sticker. I peel off the white backing and stick my printed phonogram tiles to the magnetic sheets. You can laminate your tiles ahead of time to make them more durable. And then to save time, I do all the cutting as the last step. There’s just something about using a good pair of teacher scissors to cut through a thin magnet!

Colorful Phoneme Squares
After I made my phonogram tiles, I wanted to create colored squares that I could use to represent the phonemes in the words we were building. To do that, I followed the same process but with a PowerPoint of colorful square instead. You can grab them here!

I hope this simple idea helps you and your students as you work on foundational word recognition skills! If you make your own set of magnetic tiles, send me pictures! I’d love to see them!
To learn more about phoneme-grapheme mapping and orthographic mapping, check out these resources:
Watch this presentation from The Reading League called The Development of Sight Words - Orthographic Mapping
Read Phonics and Spelling Through Phoneme-Grapheme Mapping by Kathryn Grace, M.Ed.
Check out Heart Word Magic from Really Great Reading